About 2 years ago, I authored a five-part tutorial on setting up a free/open source toolchain with Eclipse and GCC to develop code on ST's line of STM32 microcontrollers. (Part 1, Part 2, Part 3, Part 4, Part 5, Followup) That series demonstrated how challenging it can be to properly set up these tools and get them configured for the microcontroller of your choice.
Since then, ST has really upped their game and has introduced two tools that really make the process of developing for the STM32 line of parts much, much easier. In fact, I'd go so far as to say my tutorial series has been made obsolete.
The first tool is STM32Cube. STM32Cube (also called STM32CubeMX) is a Java based GUI tool that assists in the selection of an appropriate microcontroller, in the setup and configuration of on-chip peripherals, and in building a project that has all of the proper dependencies and initialization code built in. I haven't used this tool a whole lot yet, but I can tell you that I'm already wowed by it. STM32Cube is a free download from the ST website. It currently is packaged as a .zip file that includes an .exe. Running the .exe opens the GUI. Though it is a Java tool, ST only provides a version of the tool for Windows, though if you do some searching on the web you'll see that others have managed to get it working on other operating systems.
The other tool, which I'll discuss in my next blog post, is STM32 Workbench, which is a preconfigured Eclipse environment for STM32 development.
Can you see why my previous tutorial series is now obsolete?
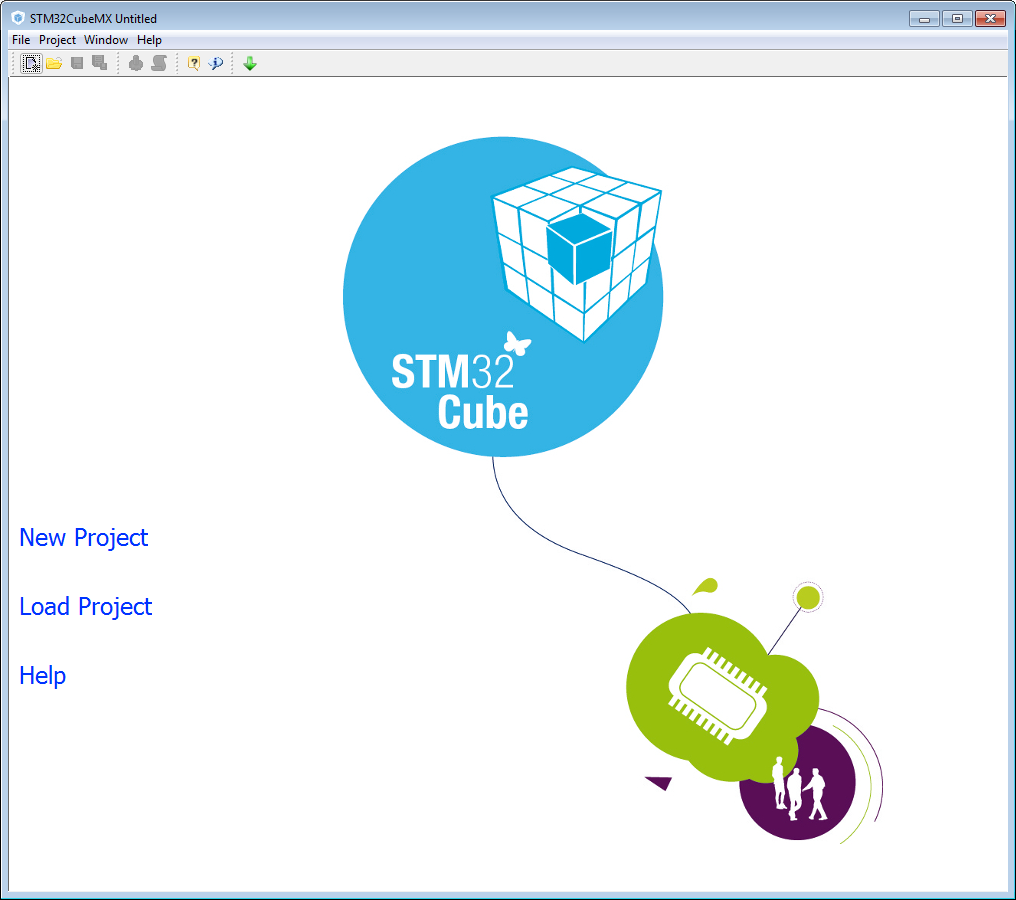
Let's first take a look at STM32Cube. Here's an example of using the tool for a project I'm currently designing. Launching the tool, the user is given a couple of pretty obvious choices: create a new project, or load an existing project (as always, click on the thumbnail for fullsize graphics):
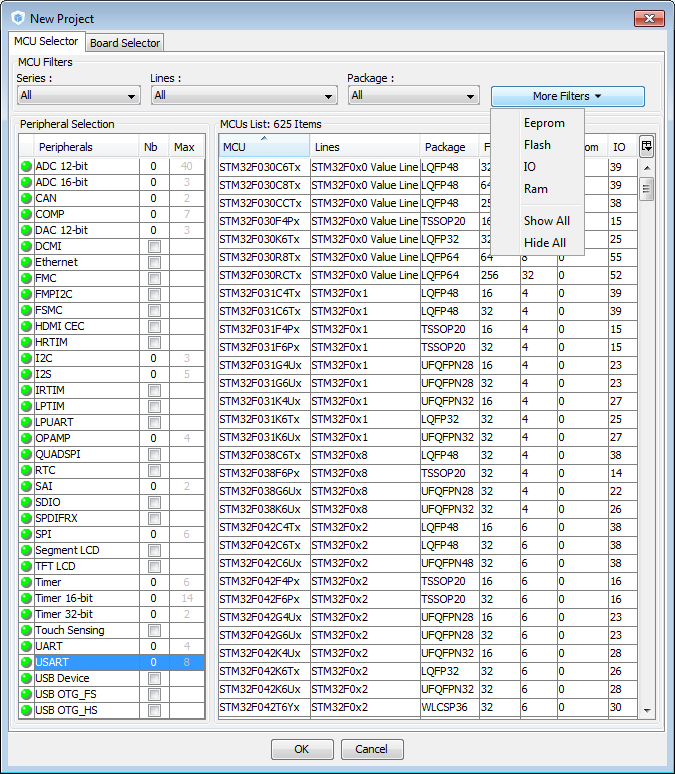
After clicking New Project, a parametric product selector is displayed. Check the onboard peripherals you want, select the chip series and package(s) you want, and the tool will tell you which parts meet your needs. Much easier than browsing Digi-Key or Mouser!
In my case, I'm designing a project that needs 3 UARTs, two I2C, one SPI, and has some EEPROM. I ended up selecting the STM32L051C6Tx chip:
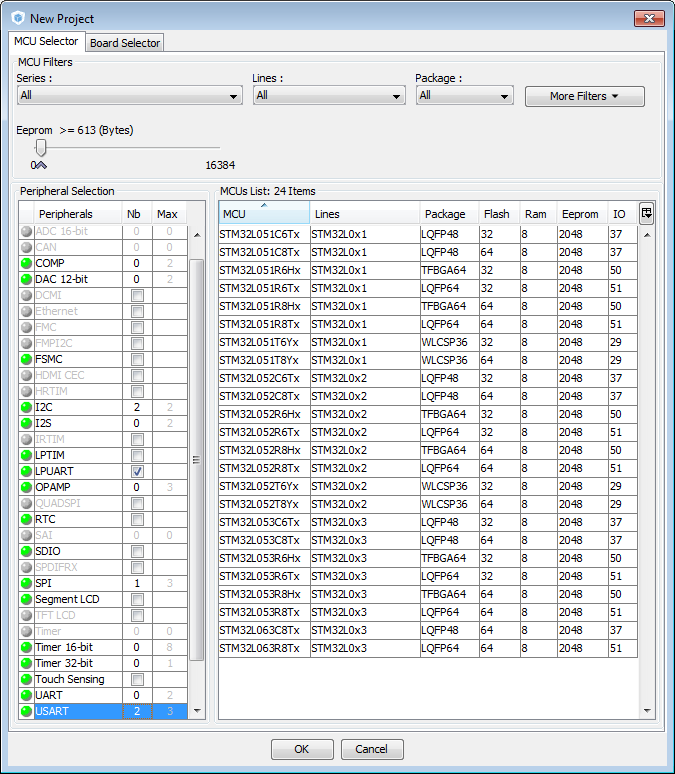
(Note that even though my project requires 3 UARTs, I still had to juggle my requirements between UARTs, USARTs, and the LPUART. I suppose no tool is perfect.)
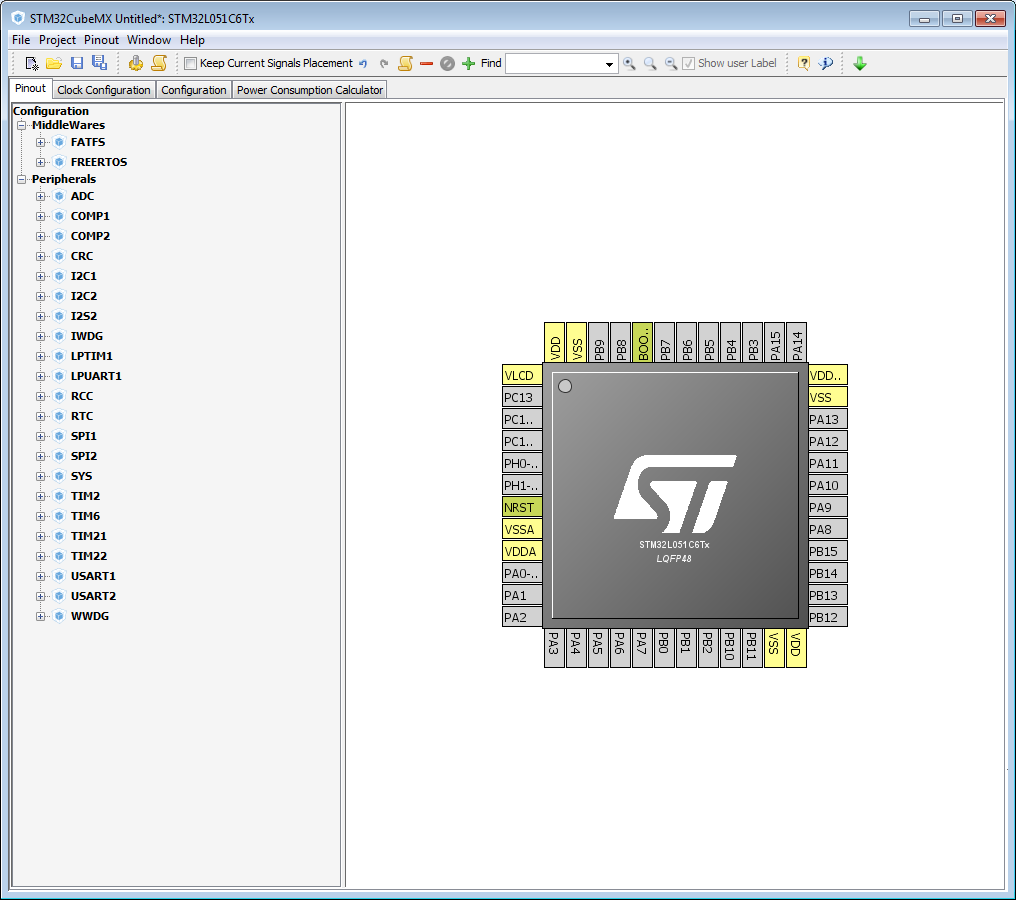
After highlighting the part and clicking OK, STM32CubeMX brings up an interface that allows you to configure the selected part. The four tabs are Pinout, Clock Configuration, Configuration, and Power Consumption Calculator. This is where STM32Cube gets really interesting.
From this blank slate, I made the following selections:
- I expanded the FATFS node and checked the box to include this middleware in my project.
- I enabled I2C1 and I2C2.
- I set LPUART1 to Asynchronous mode.
- In the RCC, I set both the HSE and LSE clocks to Crystal/Ceramic Resonator.
- I enabled SPI1 in full-duplex master mode.
- I checked the SWD debug function in the SYS node.
- I set USART1 and USART2 to Asynchronous mode.
As you can see, the pin planner tells me which pins are connected to which peripherals. If I want to map a peripheral to a pin other than the one selected, I can CTRL-click on the pin and the tool will show me which other pins can be used for that function. Red X's indicate functions that cannot be used because another peripheral is already on the required pin(s). Yellow exclamation marks show peripherals that have one or more subfeatures that are not available because required pins are in use by other peripherals.
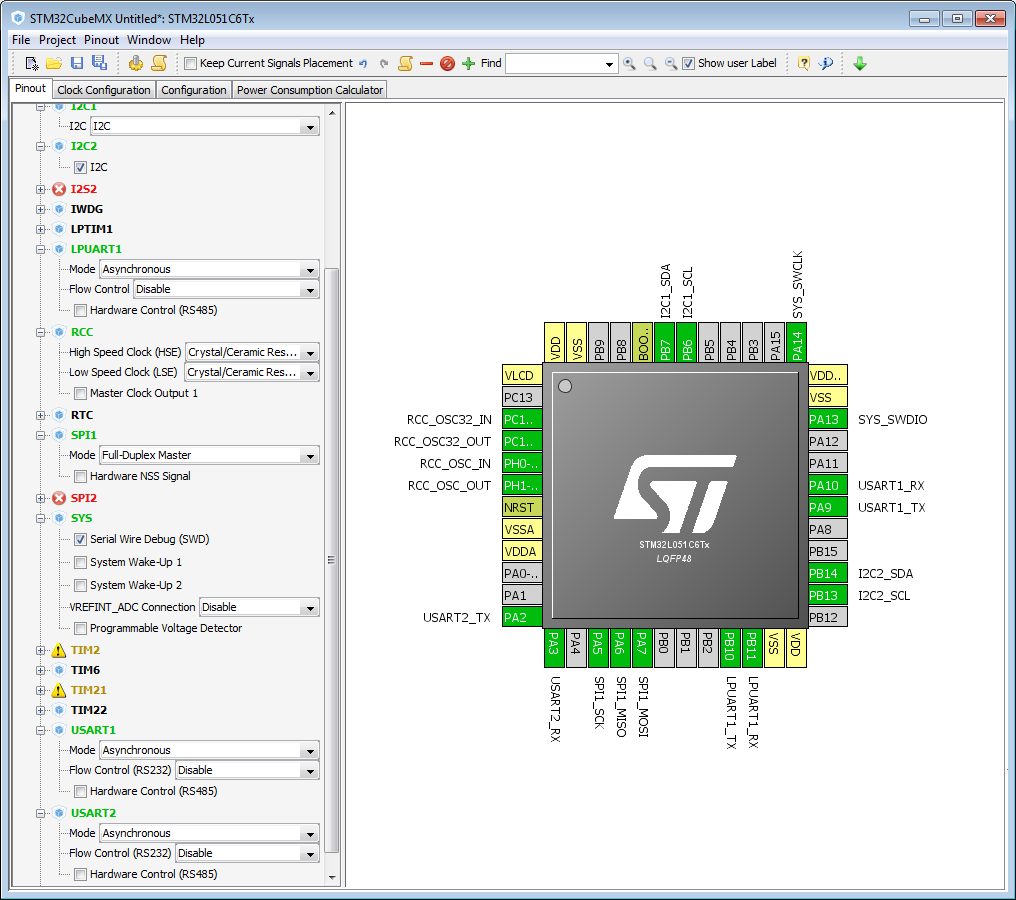
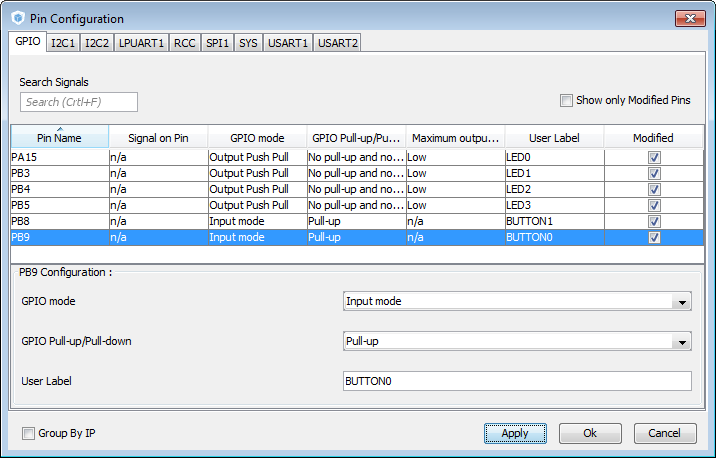
After placing the on-chip peripherals on pins, you can assign GPIO pins. Click on a pin to bring up a dropdown that lists the pin's available functions.
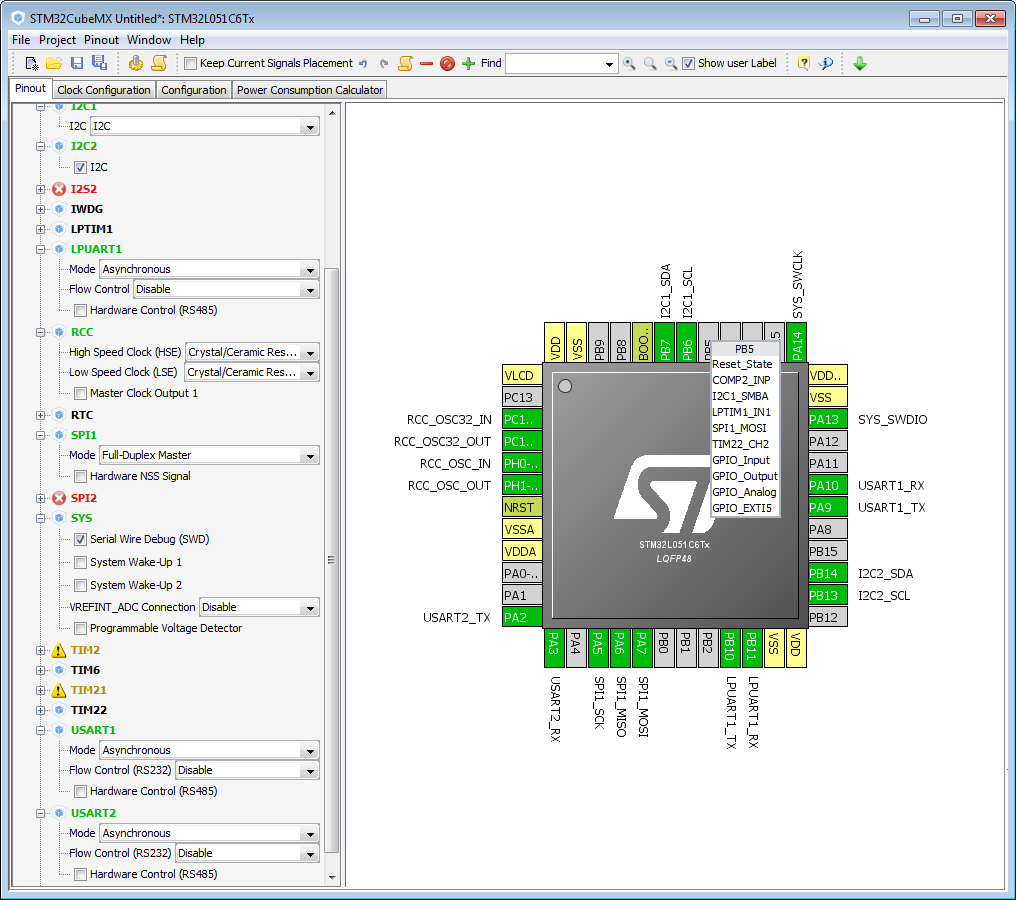
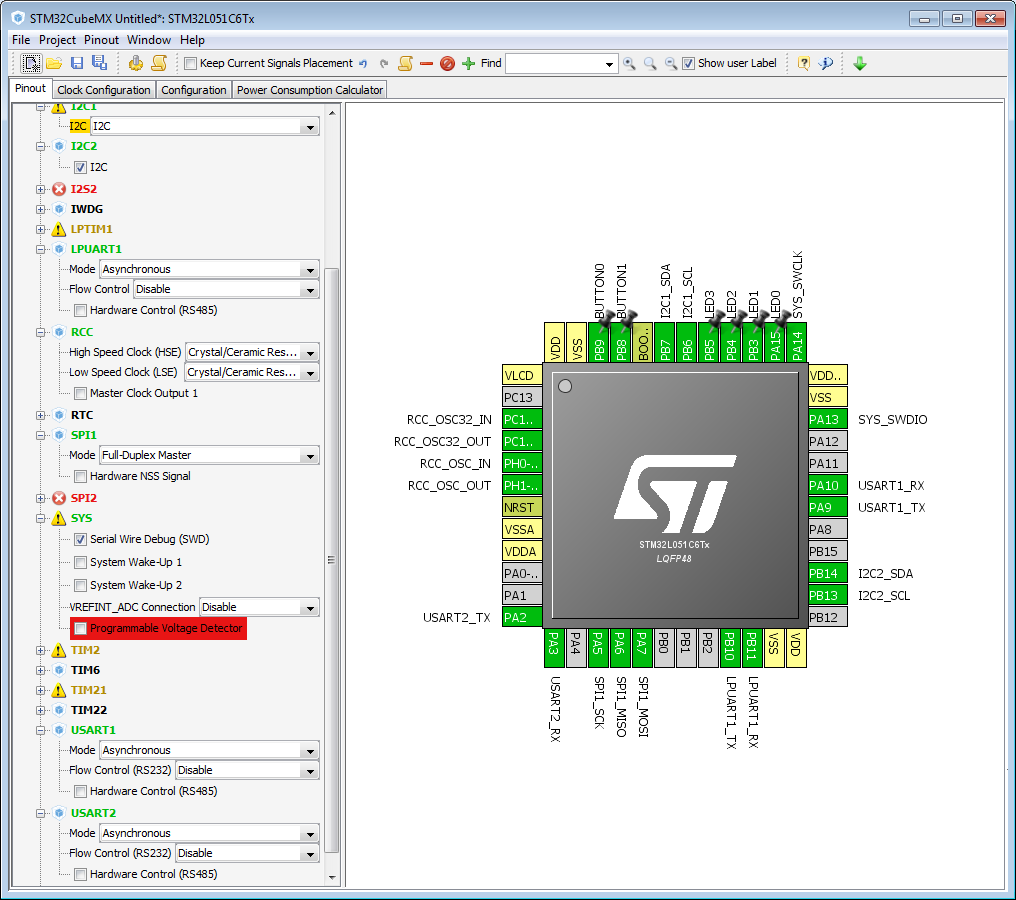
Here I've set PB3, PB4, PB5, and PA15 to digital outputs to drive LEDs, and PB8 and PB9 to digital inputs to accept signals from pushbuttons. Note that STM32CubeMX allows me to label the pins here as well. These labels will become symbols in the generated C code as well.
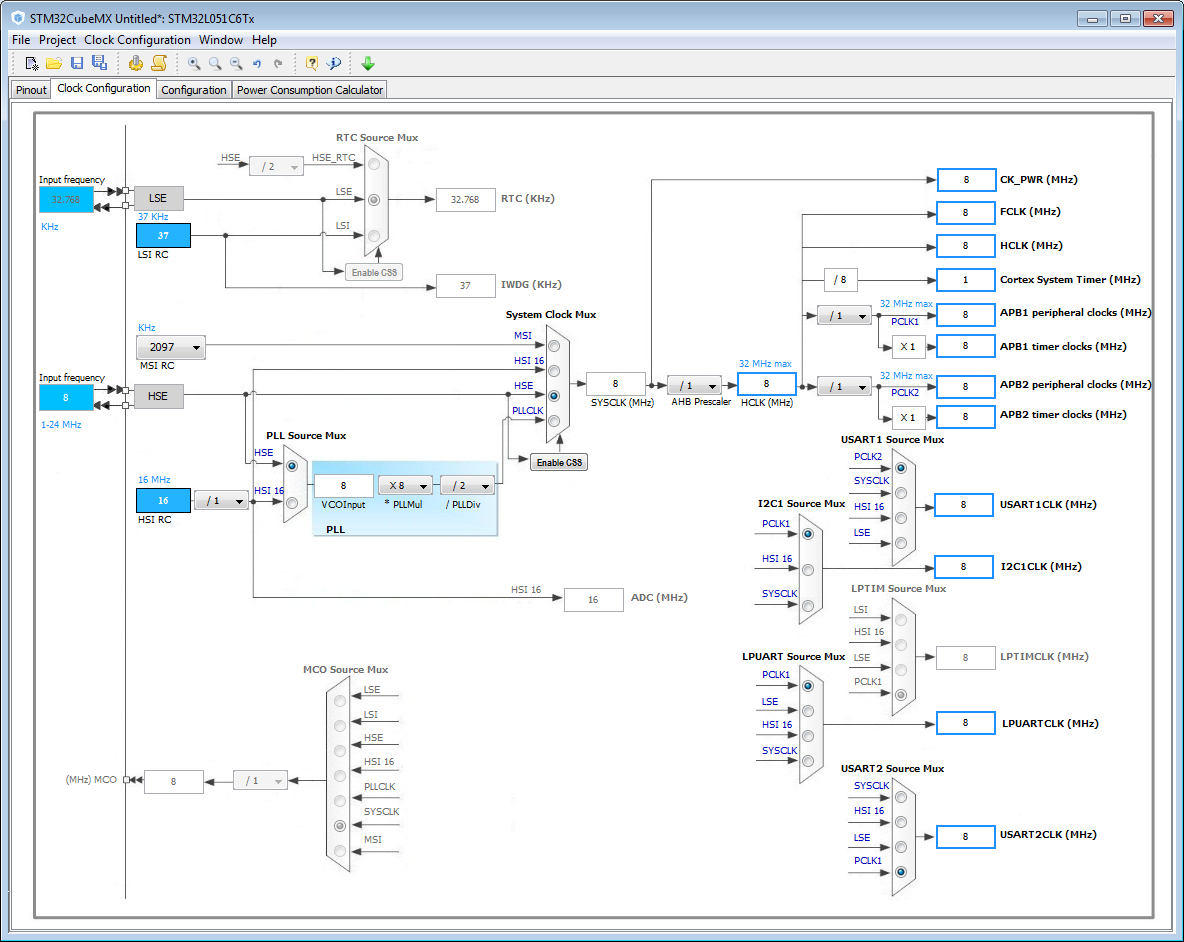
Once all the pins are assigned, we can look at the Clock Configuration tab. ST used to provide this tool as a rather inconvenient Excel spreadsheet. Now it's integrated into the code generation tool, which is nice. And given the complexity of the STM32 parts' clock systems, it saves a lot of headaches. Here, I've changed the clocking from the HSI (internal) clock to the HSE (external crystal) clock, and I've done the same for the low speed clock that drives the RTC. The system clock and most peripherals are running at 8MHz, which should be fine for my application.
After pins are mapped and clocking is done, the Configuration tab allows us to configure the selected peripherals and middleware. Here you can see that I have options for the FATFS filesystem, my UARTS, SPIs and I2Cs, the DMA controller, the GPIO pins, the NVIC, RCC and the RTC. (You'll find these terms defined in the STM32 reference manuals.)
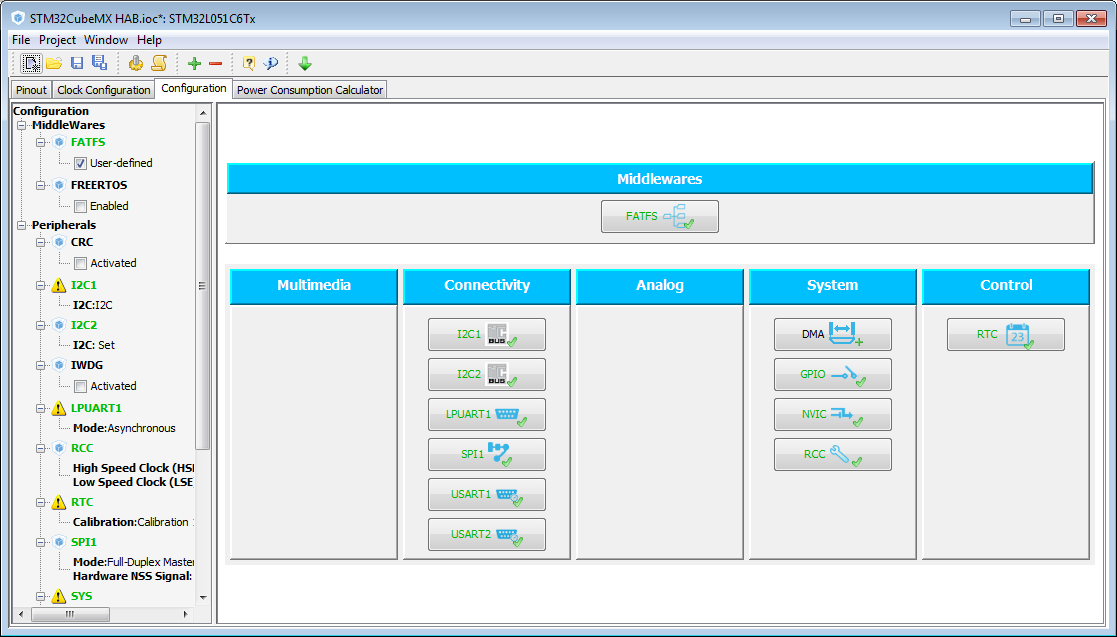
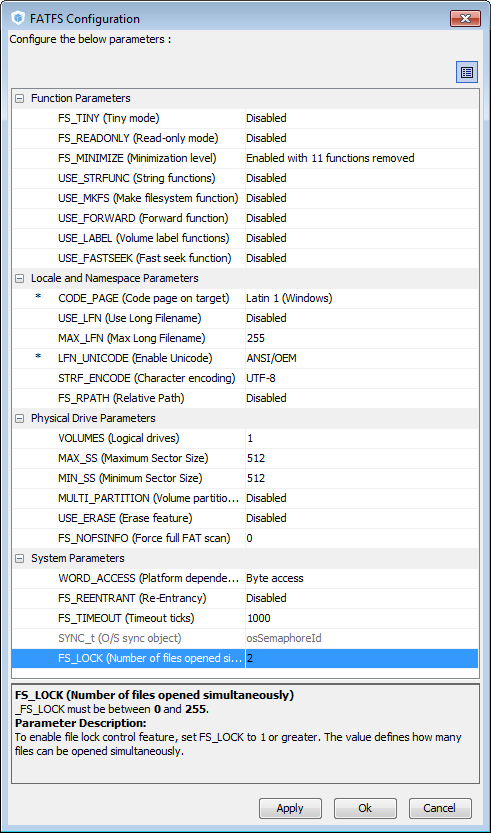
For this project, I plan on using an SD card in SPI mode to store files in a FAT filesystem. The number of options that can be compiled in or excluded from FatFS are numerous:
I'm not going to show you all the screenshots for all the peripherals, but here I am putting a pullup resistor on my button inputs so that I don't need an external resistor:
Once the pins are mapped, the clocks are configured, and the peripherals are configured comes the really fun part: automatic code generation! With the click of a button, STM32CubeMX will automatically generate a project for you, after automatically downloading appropriate libraries for your target MCU if required. The generated project files look a lot like the sample projects I outlined in my earlier tutorial series.
One interesting thing about the generated code is that there are comments embedded in the code files, such as this set in the generated main() function:
[cc lang="c"]int main(void)
{
/* USER CODE BEGIN 1 */
/* USER CODE END 1 */
/* MCU Configuration----------------------------------------------------------*/
/* Reset of all peripherals, Initializes the Flash interface and the Systick. */
HAL_Init();
/* Configure the system clock */
SystemClock_Config();
/* Initialize all configured peripherals */
MX_GPIO_Init();
MX_I2C1_Init();
MX_I2C2_Init();
MX_LPUART1_UART_Init();
MX_USART1_UART_Init();
MX_USART2_UART_Init();
MX_RTC_Init();
MX_SPI1_Init();
MX_FATFS_Init();
/* USER CODE BEGIN 2 */
/* USER CODE END 2 */
/* Infinite loop */
/* USER CODE BEGIN WHILE */
while (1)
{
/* USER CODE END WHILE */
/* USER CODE BEGIN 3 */
}
/* USER CODE END 3 */
}[/cc]
Any code that you put between the USER CODE BEGIN and USER CODE END comments will be preserved if you go back and make changes in STM32CubeMX and re-generate your code.
Now, I haven't had a lot of time to play with the tool, but it looks very promising to me, and certainly a lot easier than the hoops I had to jump through in my previous tutorial series.
Next post, I'll look at STM32 Workbench.
I installed stm32 workbench and stm3cubemx as plug-in and all seems to be just fine. I am glad you posted this I can’t wait for your next post.
Hi my friend, I want use SD card with SPI comunication, but I don’t know how configure STM32cube and FATFS CHAN library. Could you help me?
Hello
Did you ever do a blog post about the STM Workbench? If not, any plans to do so?
Thanks