Outlook: Warn Before Sending from Wrong Account

If you use Microsoft Outlook as your e-mail program and have more than one account, than odds are roughly 100% that you have, on occasion, sent email from the wrong account. It can be embarrassing to send work email from your personal account, for example.

Here's a quick fix for that. You can create a macro that will fire before an email is sent. If the email is being sent from your personal account, you can display an "Are you sure?" popup dialog before firing off the email.

I'm using Outlook 2010; I haven't taken the time to investigate how this is done in other versions of Outlook. First, you'll need to ensure the Developer tab is displayed on the ribbon. From the File tab, click Options. Select "Customize Ribbon." In the right hand dropdown, ensure "Main Tabs" is selected, and check the "Develop" checkbox.

Click on the Developer tab of the ribbon. Click on the Visual Basic button to bring up the VBA editor. Add the following code:

[cc lang="vb"]

Private Sub Application_ItemSend(ByVal Item As Object, Cancel As Boolean)
╥╥╥╥╥
If InStr(LCase(Item.SendUsingAccount), "bademail@example.com") Then
╥╥╥╥╥╥Prompt$ = "You sending this from bademail@example.com. Are you sure you want to send it?"
╥╥╥╥╥╥╥If MsgBox(Prompt$, vbYesNo + vbQuestion + vbMsgBoxSetForeground, "Check Address") = vbNo Then
╥╥╥╥╥╥╥╥╥Cancel = True
╥╥╥╥╥╥╥End If
╥╥End If
╥╥╥╥╥
End Sub

[/cc]

That's all there is to it!

Getting Started with the ARM GCC Compiler on Windows, Part 5: Debugging with OpenOCD

In part 1 of this tutorial series, we installed the GNU ARM GCC toolchain and the Eclipse IDE in order to develop for our ARM microcontrollers. In part 2, we configured the correct compiler and linker settings to get the STM32F0DISCOVERY demo code to build. In part 3, we pared down the demo project into a template to use for all of our future projects for the STM32F0 chip. And in part 4, we build a 'BlinkyLED' program from the template that uses the two LEDs and the user button on the STM32F0DISCOVERY board.

The previous tutorials are all you need to get things up and running on your STM32F0DISCOVERY board... as long as your code works the first time. If your code doesn't work the first time (like, say, my code), you'll want to add some debugging features to your build environment. If you're accustomed to writing code on a desktop computer using a modern IDE such as Visual Studio, you're used to being able to single-step through your code in the debugger from the source code, you're used to examining and modifying the contents of variables when you've broken into your code execution, and you're used to setting breakpoints in your source code. This functionality is (relatively) easy to accomplish on a desktop computer, but things get pretty tricky when trying to do the same things on an embedded platform. The STM32F0 chip has 64K of program space. Shoehorning a complex debugger into that code space along with your application code can be problematic. Continue reading Getting Started with the ARM GCC Compiler on Windows, Part 5: Debugging with OpenOCD

Getting Started with the ARM GCC Compiler on Windows, Part 4: Our First Real Project

If you've been following along, in part 1 of this tutorial we installed the free ope-source ARM GCC toolchain, GNU Make, and Eclipse. In part 2, we configured Eclipse to build the demonstration project that ships on the STM32F0DISCOVERY board. In part 3, we pared down the demo project to become a baseline template for future STM32F0 projects.

In this tutorial, we'll start with the template project we created in part 3, and build our first application for the STM32F0DISCOVERY board. This will be a simple project: it will blink the green LED. When the user button is pressed, it'll blink the blue LED instead. Though the project goals are simple, it nevertheless is a good learning exercise. Continue reading Getting Started with the ARM GCC Compiler on Windows, Part 4: Our First Real Project

Getting Started with the ARM GCC Compiler on Windows, Part 3: Making a Template Project

In my first two articles in this series, we configured our build environment to assemble, compile, and link C/C++ projects for the STM32F0DISCOVERY board using free, open-source software. We're using the Eclipse IDE and the ARM GCC compiler. We built the demo project from the sources that ship with the STM32F0DISCOVERY board and got the project to build. We used the ST-LINK utility to upload the project to our dev board and were able to run the program.

Today, let's prepare our project to be the template for all of our future STM32F0 development projects.

Continue reading Getting Started with the ARM GCC Compiler on Windows, Part 3: Making a Template Project

Getting Started with the ARM GCC Compiler on Windows, Part 2: Creating a FOSS Build Environment for the STM32F0DISCOVERY Board and Building the Demo Project


The STM32F0DISCOVERY board is a great platform for learning ARM microcontroller programming. For only $8 (Digikey, Mouser), you get a dev board with a STM32F051R8T6 microcontroller and an onboard ST-LINK programmer/debugger. Unlike dev boards from other manufacturers, the programmer is designed so that it can be used to program the onboard microcontroller, or it can be used as a standalone programmer. The board can be powered via USB and contains two user LEDs and one user button. All of the microcontroller's I/O pins are brought out to header pins on the dev board. The header pins are single-row pins, so the board can be put into a breadboard. As it ships, the microcontroller runs at 48MHz off an internal RC oscillator, but there are unpopulated pads on the PCB where you can add your own crystals for both the high speed clock and a 32.768 kHz crystal for the real-time clock/calendar.

Continue reading Getting Started with the ARM GCC Compiler on Windows, Part 2: Creating a FOSS Build Environment for the STM32F0DISCOVERY Board and Building the Demo Project

Getting Started with the ARM GCC Compiler on Windows, Part 1: Installing GCC and Eclipse
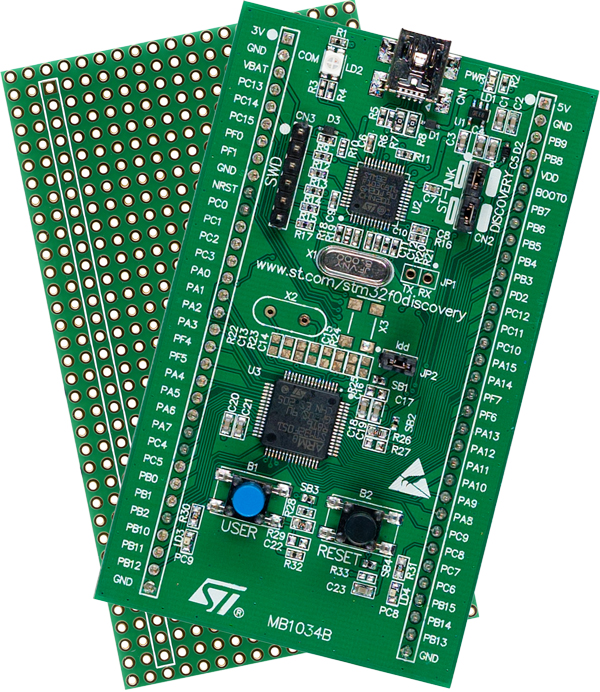
NOTE 1/13/2018: The information in this post, while it is still valuable and worth reading, is obsolete. Please don't use this technique for building a toolchain for the STM32 series of microcontrollers. I recommend using System Workbench instead, which is still an Eclipse-based platform, but has done the hard integration work for you. I plan on releasing tutorials for this tool soon. (-ish. Grad school starts this week, so any time I had to write tutorials is going to be swallowed up.

Coming from the PIC and AVR world, I've been a little frustrated with the fact that ARM microcontroller vendors don't supply free development tools for their hardware.  I've looked into commercial tools, but as a hobbyist I don't want to pay large sums of money just to tinker around with some new microcontrollers, and I'm reluctant to work with code-limited or otherwise crippled 'trial' or 'lite' versions of these packages. I've known for a while now that there is a free version of GCC that will run on Windows and cross-compile to ARM processors, but haven't really dug in to figure out how to install these tools. There's a surprising lack of clear instructions for the hobbyist to follow.

I found a tutorial written by Dr. Hussam Al-Hertani, an Electronics Technology College instructor, here. I was initially optimistic about this approach. However,the tutorial left me disappointed: Dr. Al-Hertani's approach is to maintain his own makefile, and he's content to use Eclipse as a basic text editor without leveraging the code parsing features that we all expect in a modern IDE. (Edit: Comments in part 2 of his tutorial have addressed this.) By putting include paths in the makefile, Dr. Al-Hertani's approach allows the code to build, but leaves red squiggly error indications all over the source code editor windows because the IDE hasn't parsed the include files as well. I find that these squigglies are distracting, and I find that leveraging the code-parsing features of an IDE helps me become a more effective programmer. So I set out to learn how to extend his approach to make full use of the IDE.

So I set off to teach myself how to install and configure an open-source toolchain for developing and debugging code on ARM microcontrollers. This is the first in a five-part series of blog posts on getting up and running with the STM32F0DISCOVERY board with free, open-source (FOSS) tools. Although I will be using Windows as my operating system, virtually everything in this tutorial series applies to Linux and Mac environments as well.

In future blog posts, I'll expand upon these themes for the STM32F4DISCOVERY board, the LPCXpresso board, and other ARM-based development platforms. And, of course, virtually all of the information in these tutorials will apply to other ARM platforms as well.

Continue reading Getting Started with the ARM GCC Compiler on Windows, Part 1: Installing GCC and Eclipse