In my first two articles in this series, we configured our build environment to assemble, compile, and link C/C++ projects for the STM32F0DISCOVERY board using free, open-source software. We're using the Eclipse IDE and the ARM GCC compiler. We built the demo project from the sources that ship with the STM32F0DISCOVERY board and got the project to build. We used the ST-LINK utility to upload the project to our dev board and were able to run the program.
Today, let's prepare our project to be the template for all of our future STM32F0 development projects.
Launch Eclipse and open the workspace you used to create the Template_Project. Close any files that you may have open in the text editor. Delete the Release and the Debug folders from the project; these are the folders that hold the output of the build process. The build process will recreate these folders the next time the project is built. We don't want this detritus in our template.
If you want to keep a copy of the demo project, make a copy of the Template_Project folder in your filesystem now. I named my copy Demo_Project. Be sure not to use a space in the folder name. Also, copy the file sym32f0discovery.h from the STM32F0DISCOVERY folder to the inc folder in the project structure. This will allow your project to build after we remove the STM32F0DISCOVERY library from the filesystem.
In our template project, we used files from the STM32F0DISCOVERY firmware library. Most of this library is also found in the updated Standard Peripheral Library. Personally, I don't think the STM32F0DISCOVERY library adds much value to my development efforts. Go ahead and delete the entire STM32F0-Discovery_FW_V1.0.0 folder from your hard drive.
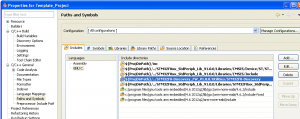
Back in Eclipse, let's remove any references to the STM32F0Discovery library. In the Project Explorer window, delete the STM32F0_DISCOVERY folder. In the project Properties, go to C/C++ General, then to Paths and Symbols, click on the Includes tab, and click on GNU C. Select All Configurations from the dropdown. Delete the include path to the STM32F0-Discovery files:
Let's delete any code specific to our project. Open main.c and delete the lengthy ST copyright notice in the comments at the top of the file. Keep the directive to include main.h. Delete the declarations of the module level variables. Delete the contents of main() so that it's an empty function. Delete the Delay() and the TimingDelay_Decrement() functions. Keep the #ifdef/#endif block for USE_FULL_ASSERT. Delete everything after that. My template main.c file is 13 lines long:
[cc lang="c"]/* Includes ------------------------------------------------------------------*/
#include "main.h"
/* Private typedef -----------------------------------------------------------*/
/* Private define ------------------------------------------------------------*/
/* Private macro -------------------------------------------------------------*/
/* Private variables ---------------------------------------------------------*/
/* Private function prototypes -----------------------------------------------*/
/* Private functions ---------------------------------------------------------*/
int main(void)
{
}[/cc]
Save the file and close the text editor tab.
Edit 9/17/2012: I later discovered that the entire #ifdef USE_FULL_ASSERT/#endif block should be part of main.c. Keep this code in your template project.
Open main.h and remove the function declarations for TimingDelay_Decrement() and Delay(). Remove the #include directive for stm32f0_discovery.h. Remove the header and footer comments with ST's copyright notice. Main.h should look like this:
[cc lang="c"]/* Define to prevent recursive inclusion -------------------------------------*/
#ifndef __MAIN_H
#define __MAIN_H
/* Includes ------------------------------------------------------------------*/
#include "stm32f0xx.h"
/* Exported types ------------------------------------------------------------*/
/* Private define ------------------------------------------------------------*/
/* Exported constants --------------------------------------------------------*/
/* Exported macro ------------------------------------------------------------*/
/* Exported functions ------------------------------------------------------- */
#endif /* __MAIN_H */[/cc]
Open stm32f0xx_it.c in the text editor. This file defines the Cortex-M0 exception and interrupt handlers. The only needed change here is to remove the call to TimingDelay_Decrement() in SysTick_Handler. Save the file and close the text editor tab. The corresponding .h file needs no modification.
The file system_stm32f0xx.c is created by the clock configuration tool. It's currently configured to run the STM32F0 at 48MHz from the high speed internal oscillator driving the PLL. If your timing requirements are different in future projects, you'll need to generate a new file for that project. But for our template, this file doesn't need any changes.
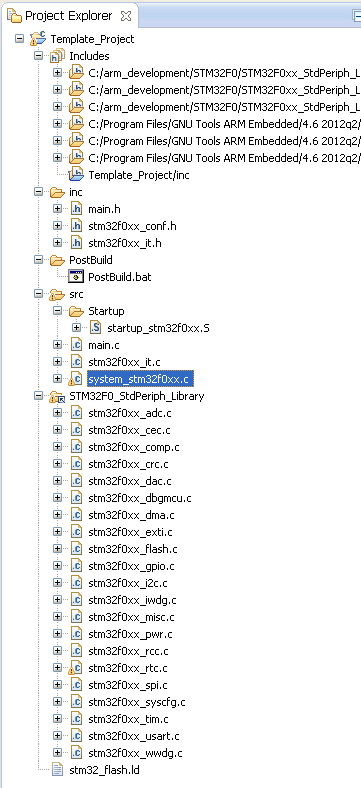
When we built our demo project, I had you put the Startup folder in the root of the project. I think that clutters up the folder structure. Drag the Startup folder into the src folder. The template project structure now looks like this:
That's pretty much it. This project is ready to form the baseline for any future project we create.


3 thoughts on “Getting Started with the ARM GCC Compiler on Windows, Part 3: Making a Template Project”