The STM32F429I-DISCO Tutorial Series, Part 5: GPIO: Lighting an LED when the Button is Pressed Using Polling

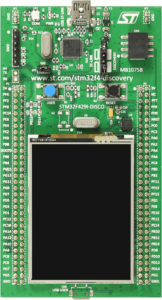
All right, now that we have our build environment set up and have tested our ability to download code to the target STM32F429 Discovery board, let's write a program that will actually do something.

In this case, we're going to write a program that will light the LED when the button is pressed, and extinguish the LED when the button is released. (Oooh! Exciting!) We're going to build the project a few different ways throughout this tutorial series to understand some of the capabilities of the STM32F429. The first method we're going to use is simple, straightforward, and horribly inefficient. It's called polling.

Basically, our code is going to have a main loop that will poll the button every time through. Kind of like kids in the back seat on a long car trip, our code will be constantly asking, "Is the button pressed now? Is the button pressed now? Is the button pressed now? Is the button pressed now?"

Polling is effective, but as we'll see in a later installment, it's not the most efficient use of the CPU and there are often better solutions. For now, though, it's quick and easy, so let's go! Continue reading The STM32F429I-DISCO Tutorial Series, Part 5: GPIO: Lighting an LED when the Button is Pressed Using Polling

The STM32F429I-DISCO Tutorial Series, Part 4: Building a Skeleton Project

In part 3 of the tutorial series, we installed System Workbench for STM32, which is an Eclipse-based IDE, onto our computer. We then installed both the standalone and Eclipse plug-in versions of STM32CubeMX, which is ST's code generation tool.

Today, we're going to use those tools to build a skeleton program, and download that program to our STM32F429I-DISCO board. Now, our program isn't going to actually do anything (we'll leave that to our next tutorial installment), but we will effectively ensure that our build environment and our debugger interface are working.

So let's get started! Continue reading The STM32F429I-DISCO Tutorial Series, Part 4: Building a Skeleton Project

The STM32F429I-DISCO Tutorial Series, Part 3: The Build Environment

Before we can program the STM32F429, we need a development environment.

To ensure that what worked for me will also work for you, I'm going to start with a brand-new virtual machine and do all my work in the VM. This ensures that I don't have any pre-existing dependencies installed on my machine that you don't have on yours.

In many ways, this series of posts will be the reviews of STM32CubeMX and System Workbench for STM32 that I promised to write a few years ago but never did.

Note: Since I started working with STM32 series microcontrollers, ST Micro has purchased Atollic, the vendor behind the TrueStudio development environment. ST has publicly commented that they intend to support both TrueStudio and System Workbench going forward. While this may be true at the current time, I am highly skeptical that ST will continue their relationship with AC6 to support System Workbench over the long haul when they own a competing product. However, since I've grown to be somewhat familiar with System Workbench, I've decided to write my tutorials with this tool despite my reservations about the long term viability of the product. The good news is, should ST abandon System Workbench in favor of TrueStudio, the migration should be reasonably straightforward.

So... let's get started!

Continue reading The STM32F429I-DISCO Tutorial Series, Part 3: The Build Environment

The STM32F429I-DISCO Tutorial Series, Part 2: Exploring the STM32F429-DISCOVERY: the Stuff you Need to Know

With our last update, we looked at some of the features of the STM32F429ZTI chip on the STM32F429-DISCO board. Today, let's look at some of the features of the Discovery board on which the chip is mounted.

A dev board, of course, is more than just the processor on the board. A manufacturer will (hopefully) include a smattering of other devices on the board to help demonstrate the features of the microcontroller. In the case of the F429 Discovery board, the following features are included: Continue reading The STM32F429I-DISCO Tutorial Series, Part 2: Exploring the STM32F429-DISCOVERY: the Stuff you Need to Know

The STM32F429I-DISCO Tutorial Series, Part 1: Exploring the STM32F429; the Stuff you Need to Know

We're going to be working with the STM32F429 Discovery board. There are two variants of this board and it's spelled different ways in different places, but for our purposes they're all the same. (The differences between the two are solely in the ST-LINK debugger portion of the board.)  In case you haven't seen it, the board looks like this (as always, click on the thumbnail for a full-size image):

STM32F429-DISCOVERYboard

Let's kick off our tutorial of the STM32F429-DISCOVERY board by talking about the microcontroller that's soldered to it: the STM32F429ZIT6. Continue reading The STM32F429I-DISCO Tutorial Series, Part 1: Exploring the STM32F429; the Stuff you Need to Know

The STM32F429I-DISCO Tutorial Series: Introduction

I recently had an embedded project idea that requires a graphical user interface (GUI) on an LCD screen and the use of a computer mouse. The STM32F429I-DISCO board, with its onboard STM32F429ZIT6 microcontroller, is perfect for this application. With the free (as in beer) tools that ST has released, and the STemWin and/or TouchGFX graphics libraries that have been made available, I figured that it would be trivial to get a simple GUI up and running on this board.

Of course, reality came crashing down around me.

So, after putting the pieces of the puzzle together, I thought I'd share with you my attempt at creating a GUI program from scratch for the STM32F429 discovery board. Like I did in my series on building a toolchain for the STM32 processors (which, by the way, you shouldn't use any more now that ST and AC6 have released System Workbench for STM32), we'll do this the long way, so that we learn what each step along the way does. We'll visit many of the STM32F429's integrated peripherals along the way. By the end of this series of blog posts, you should have a solid understanding of how to build a GUI program (and, by extension, just about any program) from scratch for the ST series of processors.

Note that I'm not done writing this stuff yet, and I don't know for sure where I'll end up, but I have some Big Plans ahead! Continue reading The STM32F429I-DISCO Tutorial Series: Introduction

An Assembly Language Delay Routine for ARM Microcontrollers

I'm in the midst of writing some code to initialize an LCD screen. The initialization requires me to send a command, then wait for at least 50 milliseconds, then send more commands.

If you're using an Arduino, this is easy: you call the [cc lang="C" inline="true"]delay()[/cc] function. If you're graduating from the Arduino to a more 'bare metal' development environment, you may find yourself looking for this function that doesn't exist on your platform.

Furthermore, if you do a Google search for delay routines on an ARM microcontroller, the near universal reply is, "you should use a hardware timer for that!" Continue reading An Assembly Language Delay Routine for ARM Microcontrollers

Using the FAT filesystem on SD cards with the STM32F4 Processor: Part II

In part I of this tutorial, we created a project for our STM32F4DISCOVERY board that read and wrote sectors to an SD card. In today's installment, we'll add a filesystem on top of that. Continue reading Using the FAT filesystem on SD cards with the STM32F4 Processor: Part II

Using the FAT filesystem on SD cards with the STM32F4 Processor: Part I

The other night I was able to get my STM32F4DISCOVERY board to read and write files on an SD card formatted with the FAT filesystem. While I haven't done extensive testing of my code, I'm comfortable enough to share what I have with the world. Writing to a filesystem is obviously a convenient feature in many projects. Here's how you can do it with an STM32F4 processor. What follows is the long story; you can find my code at the end of the post. Continue reading Using the FAT filesystem on SD cards with the STM32F4 Processor: Part I

A system_stm32f4xx.c File for STM32F4DISCOVERY Projects

Because HSE_VALUE (that is, the speed of the high frequency clock crystal) is defined as 25MHz in stm32f4xx_conf.h, and the STM32F4DISCOVERY board actually has an 8MHz crystal fitted, any clock speed calculations done based on the files in the Standard Peripheral Library are going to be wrong. Continue reading A system_stm32f4xx.c File for STM32F4DISCOVERY Projects